RHINO RACK (NEW STYLE BRACKET)
Moving forward, to remove any confusion between the 4/5 plank, new/old style, and which one is required for your vehicle/rack set up, we have redesigned our bracket to be suitable to all straight out of the box. For installation of the older style 4 & 5 plank brackets, we have kept them below for reference.
IMPORTANT NOTES:
- All three M10 bolts must be used to mount the base of the U Bracket to your vehicle. Using only one or two bolts will result in excess vibration of the lamp and ultimately result in bracket failure.
- Before fitting stainless steel hardware, we recommend applying a small amount of anti-seize to the threads of any mounting bolts.
1. Set out all components and familiarise yourself with contents.
2. Measure length and height of lightbar to determine approximate plank and position the light will be mounted (forward mount or under mount).
FORWARD MOUNT BRACKET
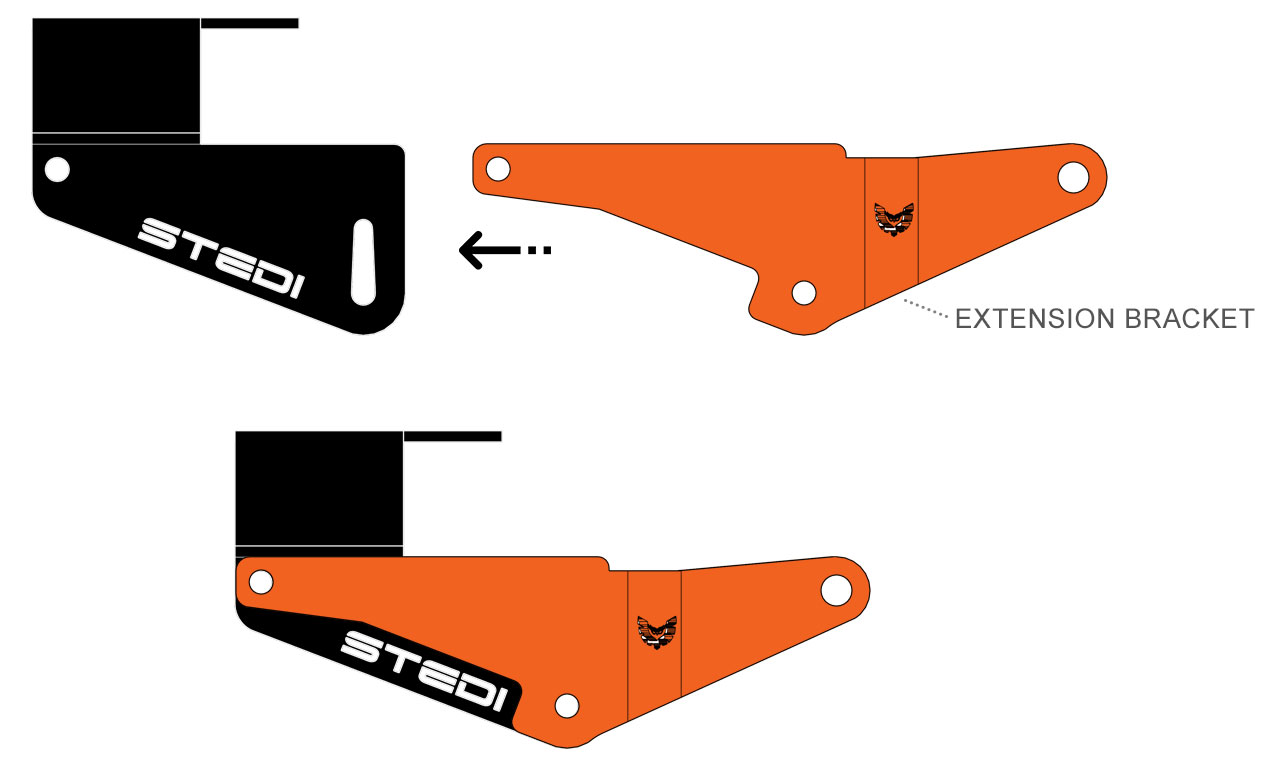
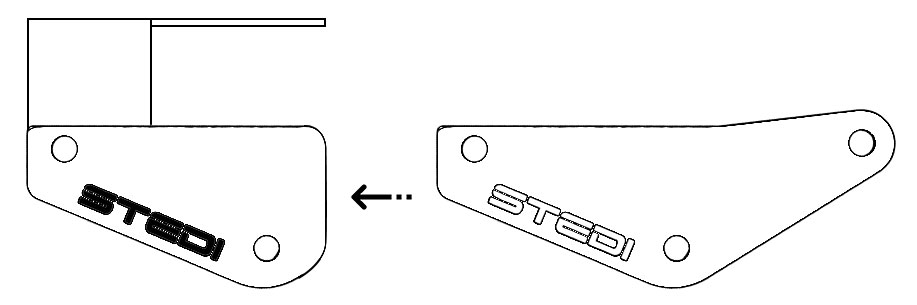
2a. If using forward mount plates, assemble included M8x18mm button head bolt through side plate into the main bracket and affix flat washer and nylock nut on the back and tighten to sufficient torque. (note: If installing with extension plate to new 52100 platforms, refer instruction 4a)
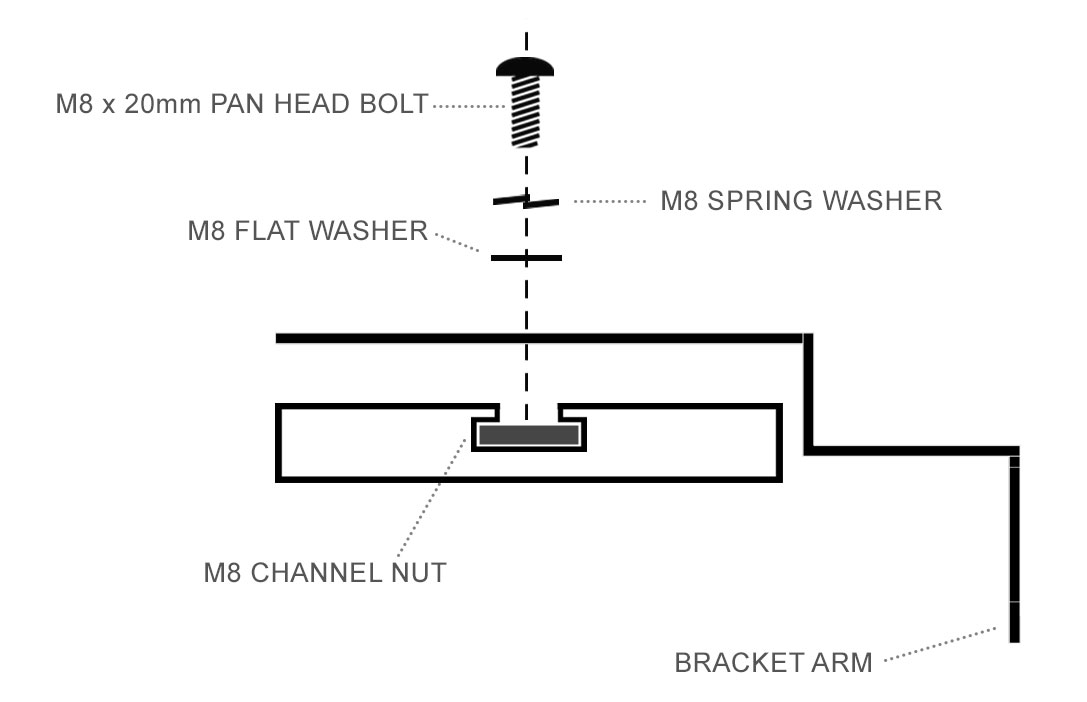
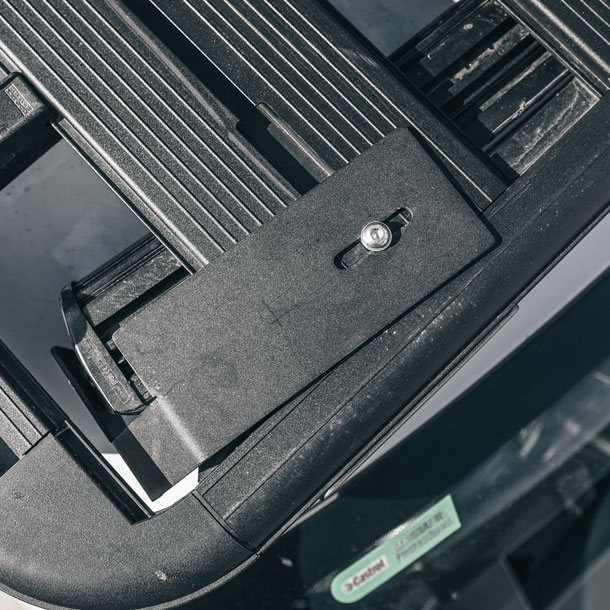
3. Assemble one M8x20mm, spring, and flat washer through a slotted hole in the top plate and loosely attach rectangle channel nut (a couple of threads will be sufficient). Offer assembled bracket to appropriate plank, lining up channel nut, and slide forward and finger tighten. Alternatively, position channel nut into the ‘C’ channel of the platform and place bracket over this and affix with the M8 button head, spring, and flat washer.
4. If fitting to the original Rhino platform, with the help of a friend, offer lightbar to bracket and use the hardware supplied with the lightbar to fasten into the Roof rack bracket.
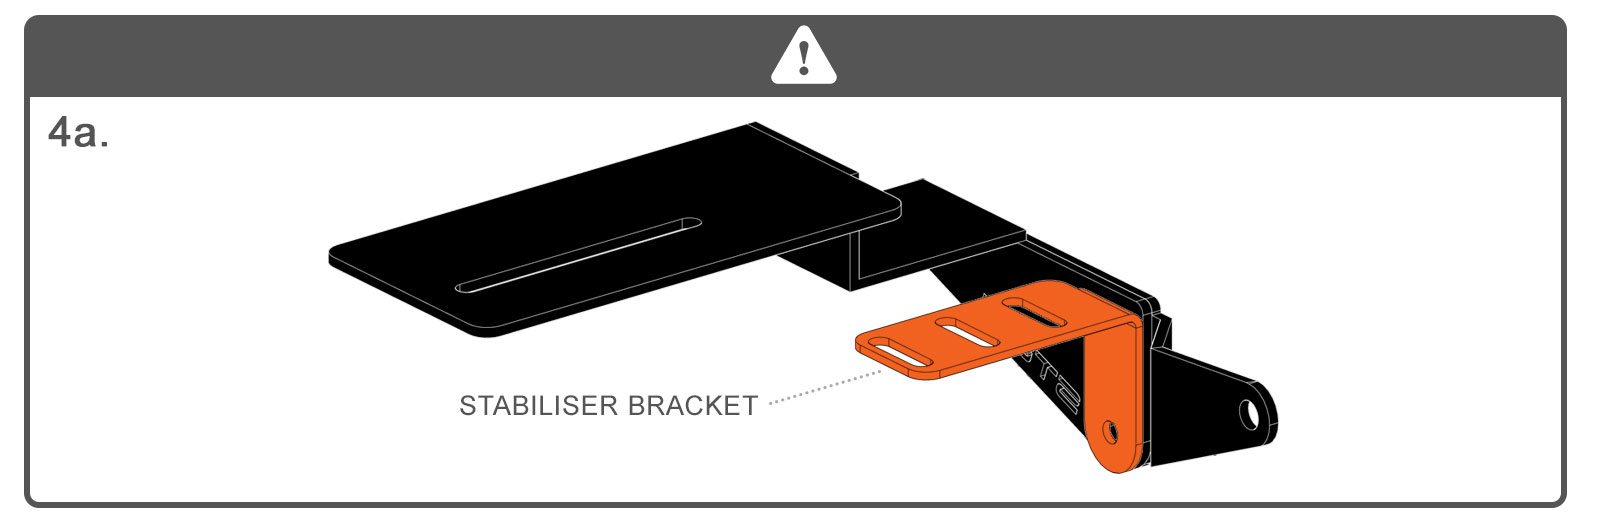
4a. If installing bracket to new 52100 Rhino platform with extension plate, offer lightbar to brackets and align the rough final position and loosely tighten bracket down to the rack. Assemble stabiliser bracket with M8x20mm bolt, spring, and flat washer and offer to the underside of the front of the rack. The channel opening can be found in the centre of the front extrusion. Slide this along until it reaches the side bracket and sandwich with the other two plates. This stabiliser bracket is designed to help carry the weight whilst using the extension plate. Once it is installed in the correct position, tighten everything down, and offer lightbar to bracket and fasten.
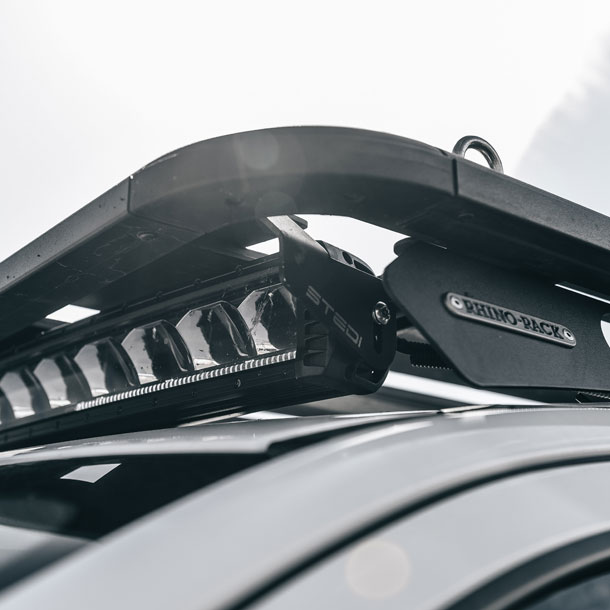
5. Carefully align the two brackets and lightbar to sit symmetrically on the roof rack and tighten.
6. Once lightbar is wired up, head out to your favourite dark location and aim the lightbar and torque down tightly. (Refer to Roof Light Bar wiring instructions for methods of installation)
RHINO RACK OCTOBER 2019 UPDATE (OLD STYLE BRACKET)
The following instructions and diagrams are a guide to help you install the brackets to your vehicle.
Once all the hardware fitting has been completed, check out our Roof Wiring guide.
1. Set out all components and familiarise yourself with contents.

2. Measure length and height of lightbar to determine approximate plank and position the light will be mounted (forward mount or under mount) (Forward mount bracket)
2a. If using forward mount plates, assemble included M8x18mm button head bolt through side plate into the main bracket and affix flat washer and nylock nut on the back and tighten to sufficient torque.
4 PLANK RHINO RACK
5 PLANK RHINO RACK
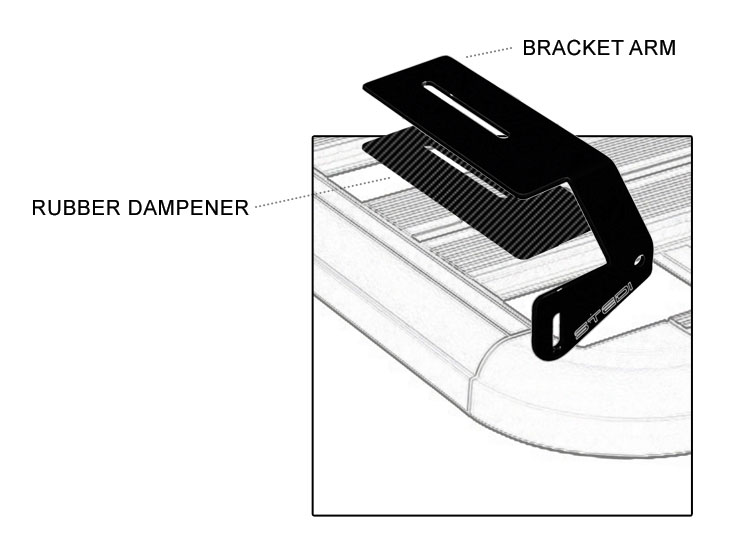
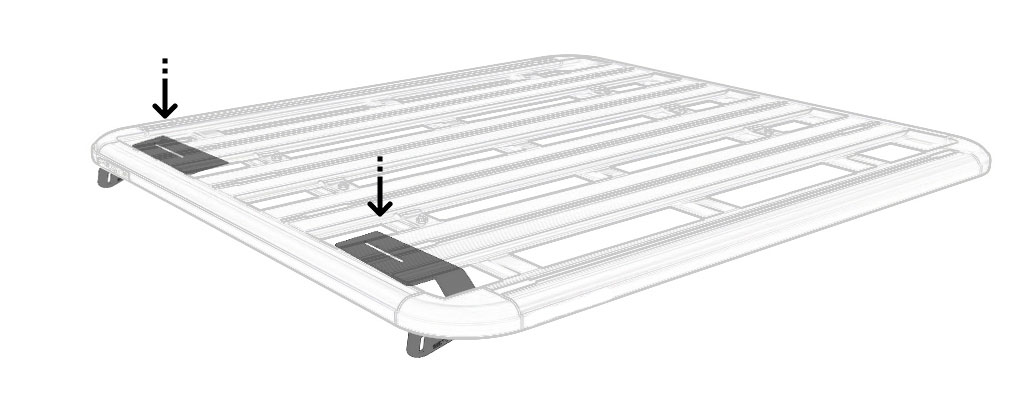
3. Assemble one M8x20mm, spring, and flat washer through a slotted hole in the top plate and rubber dampener and loosely attach rectangle channel nut (a couple of threads will be sufficient). Offer assembled bracket to appropriate plank, lining up channel nut, and slide forward and finger tighten. Alternatively, position channel nut into the ‘C’ channel of the platform and place bracket over this and affix with the M8 button head, spring, and flat washer.
4. With the help of a friend, offer light bar to bracket and use the hardware supplied with the light bar to fasten into the Roof rack bracket.
5. Carefully align the two brackets and light bar to sit symmetrically on the roof rack and tighten.
6. Once the light bar is wired up, head out to you favourite dark location and aim the light bar and torque down tightly. (Refer to Roof Light Bar wiring instructions for methods of installation)
Good to know: Our main mounting arms of our Rhino bracket has intentionally been designed to be 1mm undersized. A small amount of pressure will need to be applied to push the bracket down on the upper plank to then secure the channel nut. This pre-loads the bracket with tension which in turn eliminates any prospect for vibration on installed.
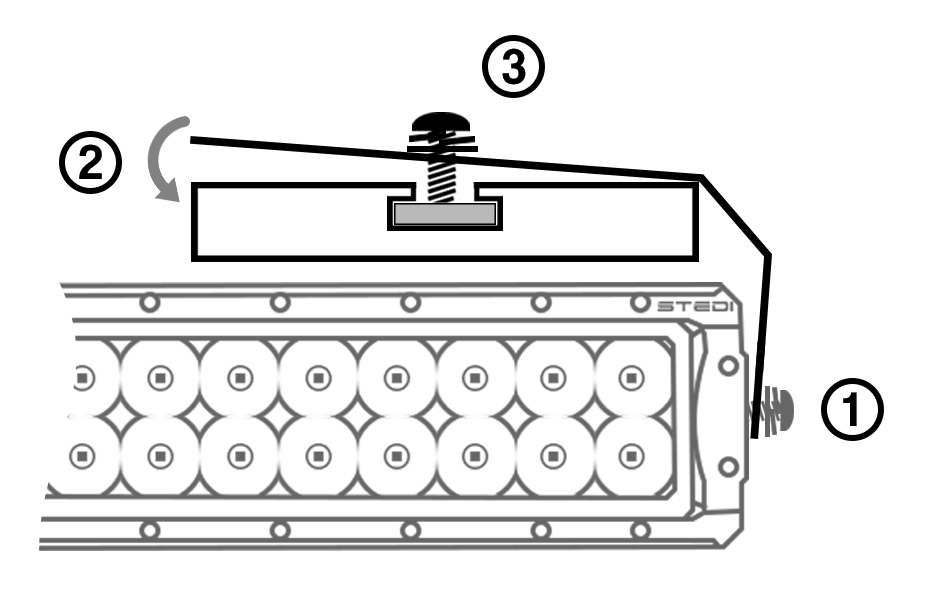
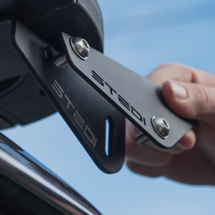
1. Insert channel nut & loosely fit the light bar to the bracket arm.
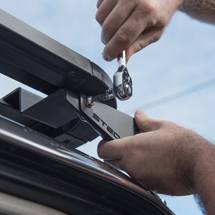
2. Apply pressure to the bracket arm pushing down on the top plate.
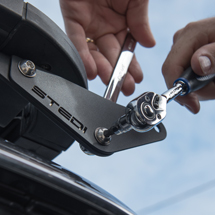
3. Insert the bolt into channel nut whilst still applying pressure to bracket arm.
Note: In order to mount a Curved series ST2K bar, you will only be able to mount it underneath the rack. A minimum height of 90mm will be required to do this. There are two ways to mount this bracket to suit the curved light. See below.
EXTENSION PLATES