STEDI SMART™ HARNESS RANGE
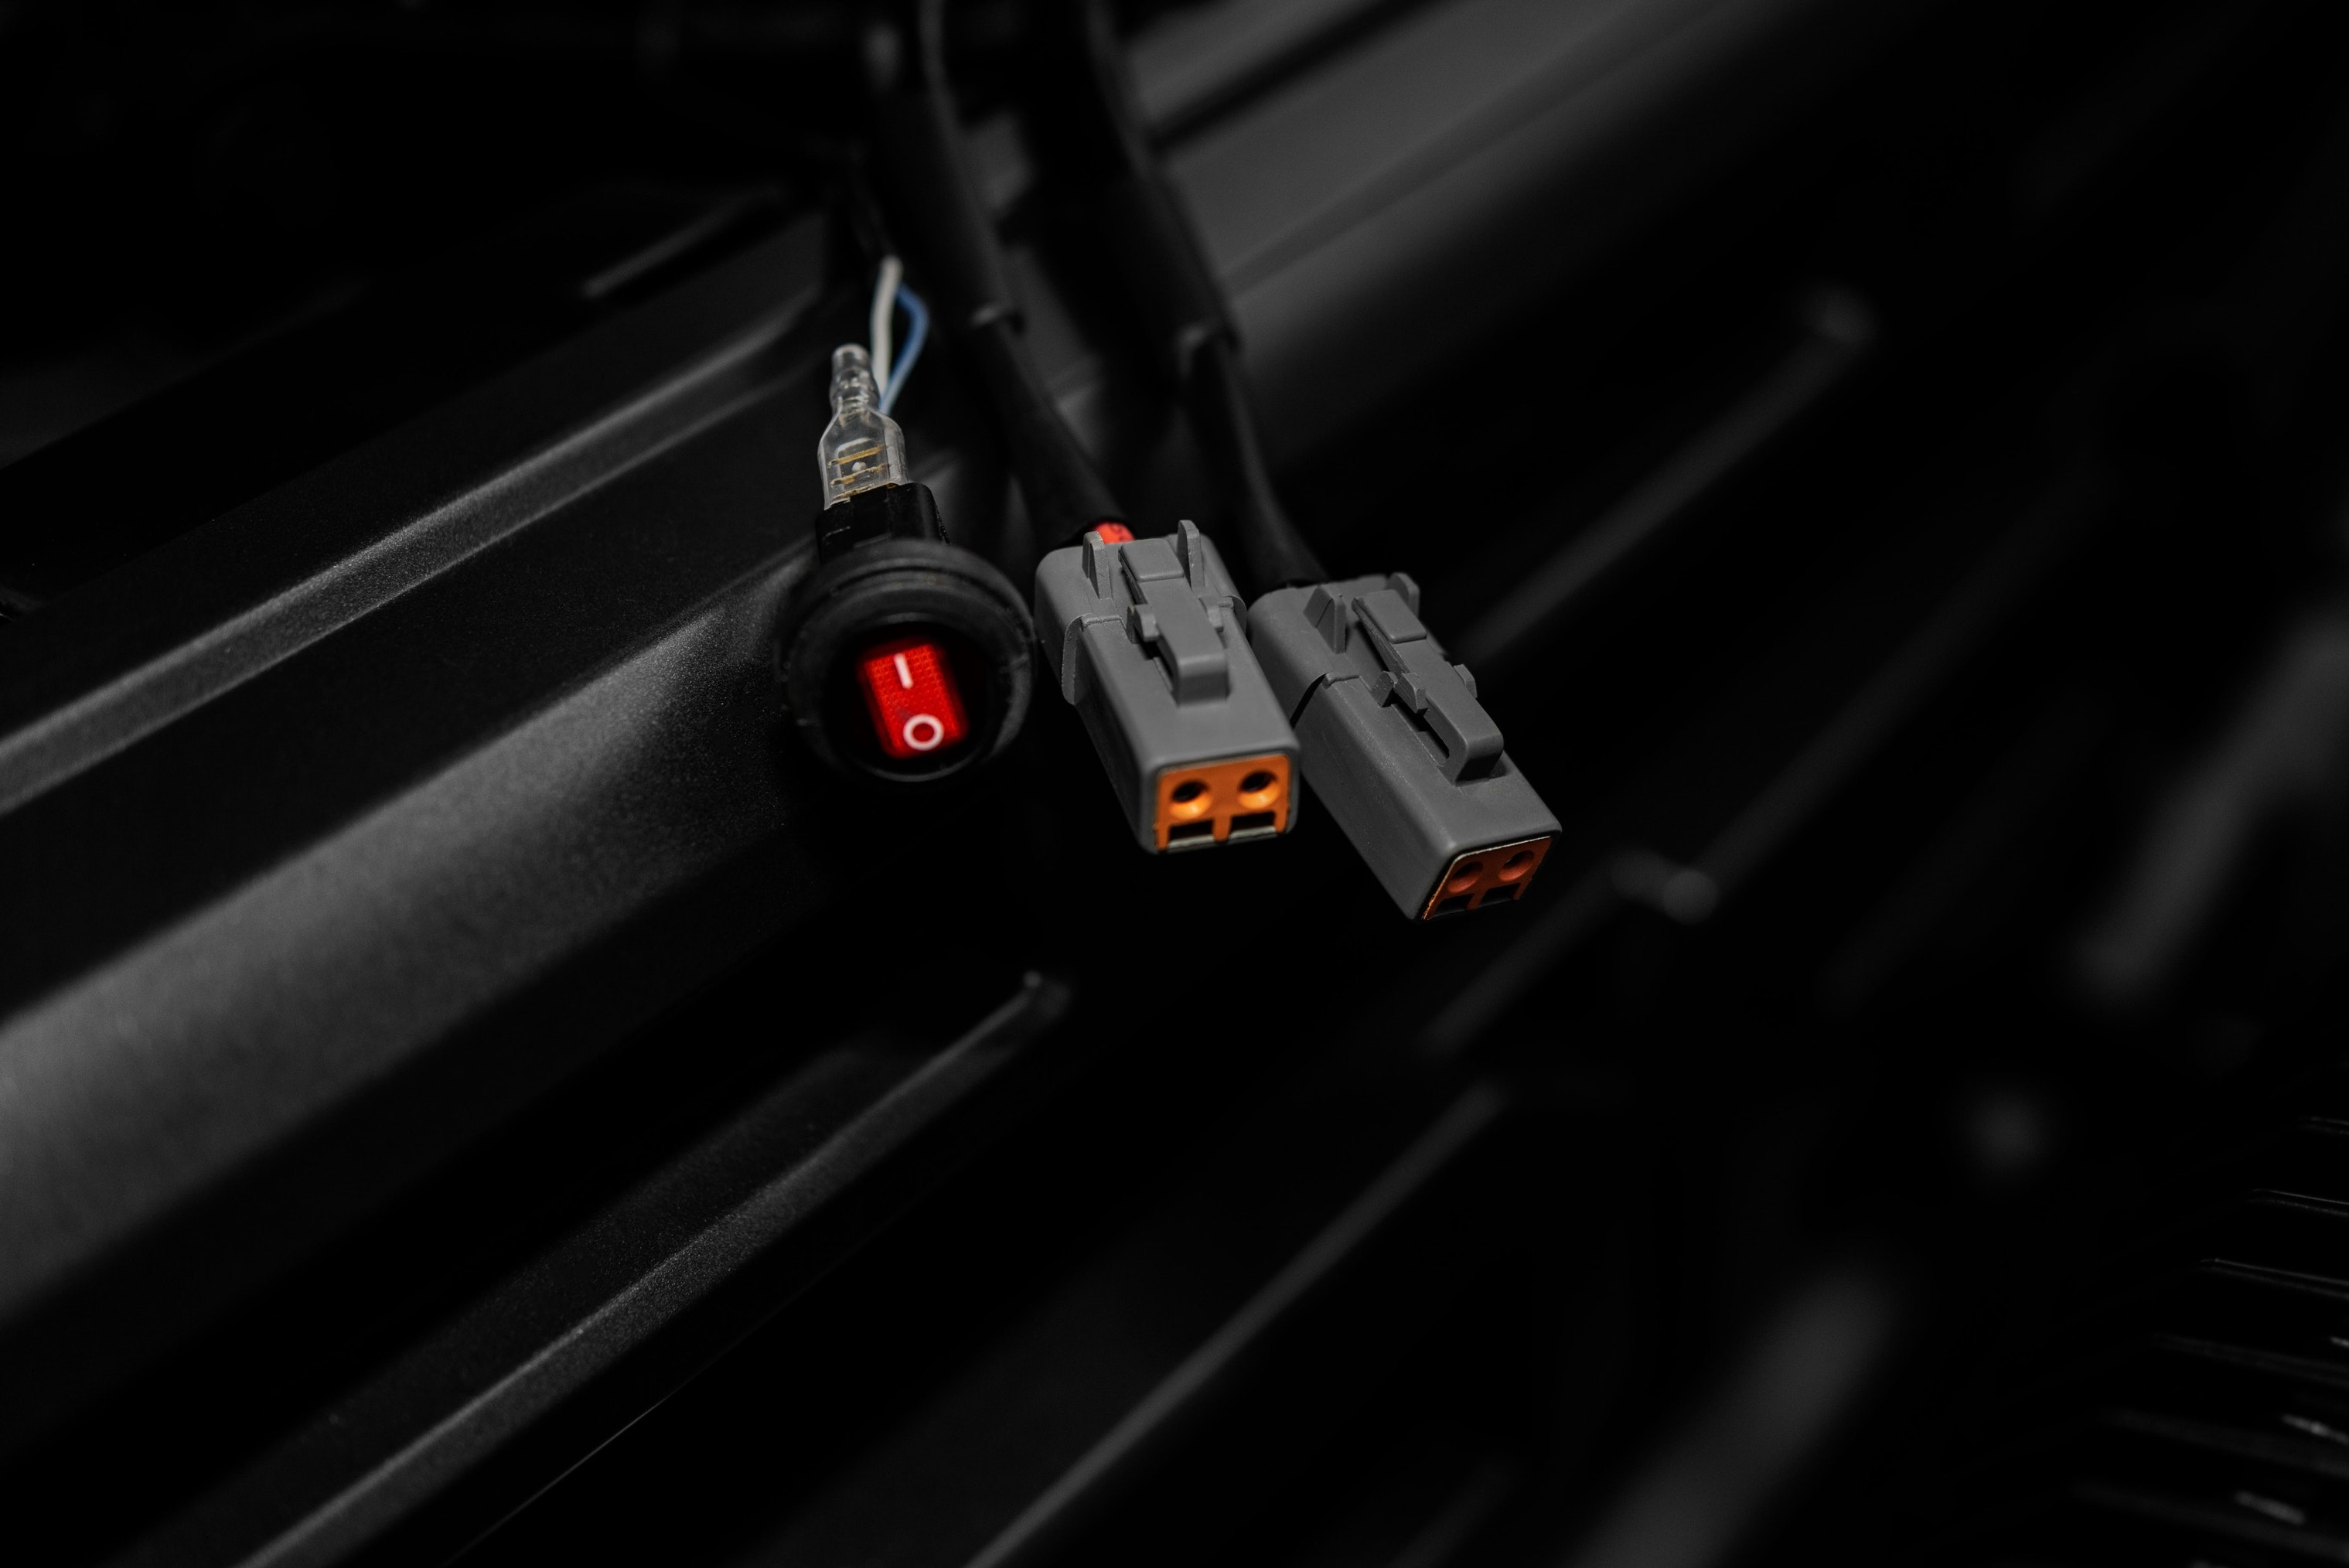
To keep things simple, the difference between the 2 Smart™ Harnesses within our range (excluding the NP300 harness) is the difference between 1 or 2 outputs. With our recent upgrade in our single output harness to a larger DT-P Deutsch plug (and now including a DT-P to DT reducer), this will remove the confusion between the 2 out of the box, as the harness is now compatible with both. Our SMART Harness™ has a built-in microprocessor that automatically detects whether your system is positive or negative switched. This will work right out of the box without any modification whatsoever. Toyota's, Ford Ranger, Mazda BT50 (among many other popular 4x4), are notorious for being very difficult and costly to wire driving lights to high beam, our quick fit harness takes all the guesswork out of it.
DUAL OUTPUT:

- Featuring a total of 4.8 meters of wiring (full stretched out)
- 2.4m of cabling from Relay to Switch
- 2.0m of cabling from Driving Light connector to Relay
- 2.0m from high beam adapter to Relay
- Total cable length 6.4m
- 12vDC 35A Rated Fuse Kit
- 12vDC 60A Switching Relay
- Push Button ON/OFF Switch
- H4 + HB3 Piggy Back adapter
- 2x DT-P to DT reducer
- UV Rated Insulation
- Instructions included


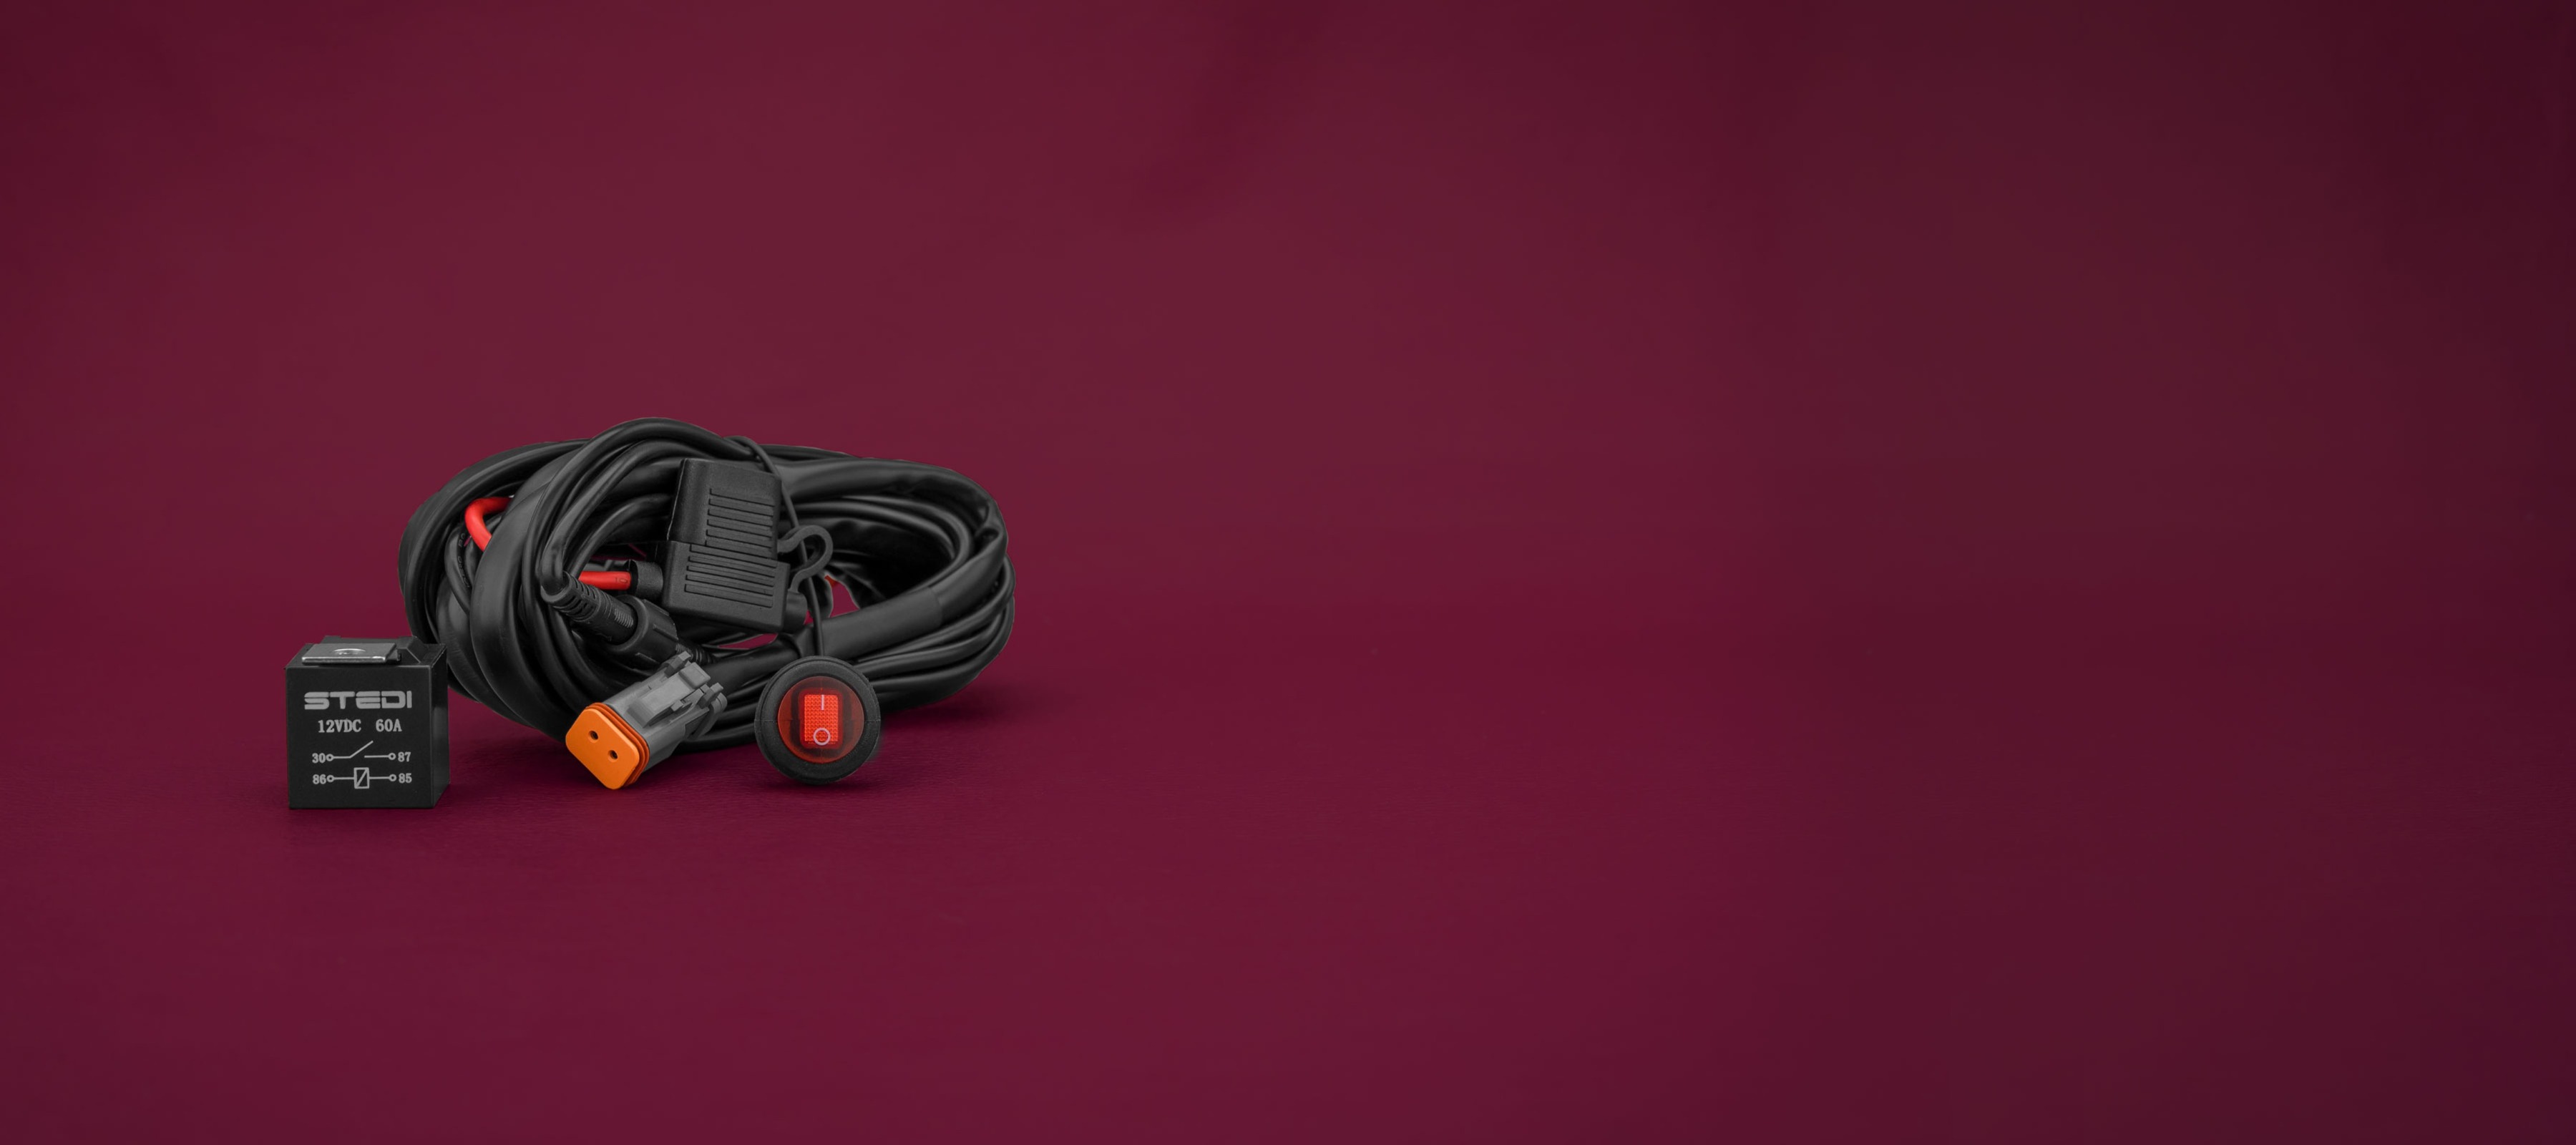
SINGLE OUTPUT:
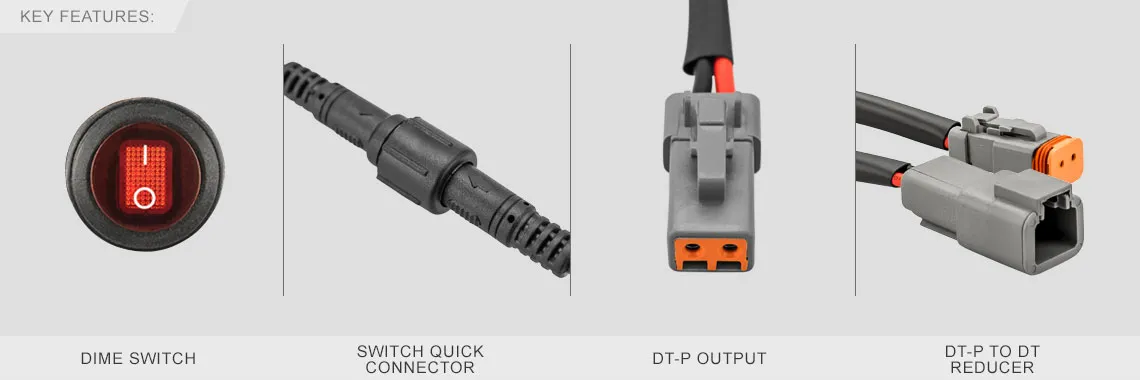
- Featuring a total of 4.8 meters of wiring (full stretched out)
- 2.4m of cabling from Relay to Switch
- 2.0m of cabling from Driving Light connector to Relay
- 2.0m from H4 or HB3 Adapter to Relay
- Total cable length 6.4m
- 12vDC 30A Rated Fuse Kit
- 12vDC 40A Switching Relay
- Push Button ON/OFF Switch
- UV Rated Insulation
- Instruction included.
- 1 x DTP connector to connect 1 Light Bar
STEDI WORK LIGHT WIRING HARNESS
For work lights (or other lighting applications that still need a comprehensive wiring harness but not the need to be high beam triggered), we have our work light harness. Simple on/off switch operation that can trigger your work lights set up around the vehicle with easy additional wiring components, to split or extend the DT output to multiple lights.
NOT HIGH BEAM TRIGGERED:
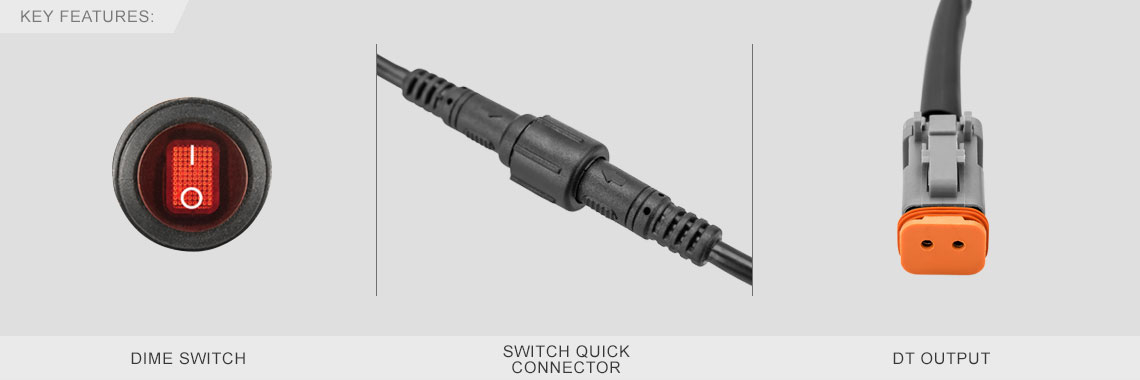
- 2.8m of cabling from Relay to Switch
- 2.0m of cabling from light connectors to Relay
- 12vDC 30A Rated Fuse Kit
- 12vDC 40A Switching Relay
- ON/OFF Switch
- UV Rated Insulation
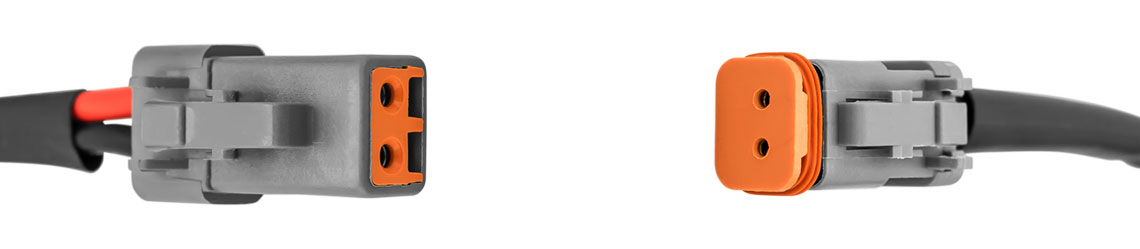
DT vs DTP, WHAT'S THE DIFFERENCE
The difference between the 2 common types of connectors found on most LED lights is quite straightforward, but not only divided by physical size. The larger DT-P plug also carries a much higher current draw, which is why you will generally find them on most spotlights or light bars generally above 22 inches. Below is a side-by-side comparison between the 2 types as you will only need to identify the physical size between the 2 to match up to what you need.
On the left, you can see the DTP is a tad larger and has a slightly different face to the plug than the DT.
12v & 24v RELAY COMPATIBILITY
For vehicles such as trucks, camper vans, and a small handful of 4x4's that run 24v systems, all harnesses in our range will be compatible with 24v vehicles with a change of the relay to the 24v relay. This is a simple swap over, as all you need to do is unplug the existing 12v relay, and swap in the new 24v relay. For those needing a 12v relay, nothing will need to be changed, good to go out of the box.
EXTENSIONS & SPLITTERS
Although our harnesses should suit most applications (in terms of length, outputs, etc), some installs may require additional wiring components to extend or split an output (as used for work lights that are roof mounting or similar). Below we will add a link to our current range of extensions and splitters. Remember when browsing to keep in mind some will be DT or DT-P. These will not connect to one another without a reducer for DT-P down to DT or you can manually join the 2.
HIGH BEAM PIGGY BACK ADAPTERS - VEHICLE SPECIFIC
With a growing list of cars in their entirety or certain trim levels coming factory fitted (with either LED or HID headlights), using the traditional piggyback method can prove difficult. Using our Smart™ harness paired with one of our vehicle-specific piggyback adapters, you can return the install back to a simple plug & play. Click below to find the compatible piggyback for your vehicle.

These vehicle-specific adaptors can also provide a cleaner install on vehicles that maintain a factory halogen high beam, but that also have solid sealed dust covers. For example, the Ford Ranger PXII has a halogen high beam, but to use the standard HB3 adapter will require drilling a hole through the dust cap for the connector to pass through, or alternatively, manually splice into the high beam positive wire externally and ground to the battery or chassis. Using our Ford Ranger piggyback adapter: it will grab a signal from the main power plug at the back of the headlight unit, avoiding any modification for install.
HIGH BEAM PIGGY BACK ADAPTERS - TRADITIONAL
For vehicles with halogen headlights, this is quite a straightforward match. Included with all high beam triggered harnesses (excluding vehicle specific) are the H4 and HB3 piggyback adapters, as they are the 2 most common globes found in vehicles high beam. If the included H4/HB3 adapters do not suit your vehicle, you will simply need to identify your vehicle's high beam globe and marry it up with the suitable one in our range available here.
Currently available in our range are H2, H4, H7, H8, H9, H21, H26, HB3, and HB4.
PIGGY BACK DIAGRAM
The below diagram will help to visualize the install of the piggyback adapters. The diagram shows the traditional style piggyback adapter, but it is still relevant for the vehicle specific. For vehicle-specific adapters: instead of picking up the high beam from the globe, you will instead use the main power plug in the back of the headlight unit.

IMPORTANT NOTES
DISCLAIMER: Please ensure you check with state and local authorities for laws governing the use and proper mounting of LED Driving lights. For completeness, we have included a link that covers the most recent amendment to the ADR that deals with the legalities surrounding mounting LED Light Bars and Driving Lights.
Modern motor vehicles are increasingly equipped with complex electronics and it is recommended your LED Light Bar is installed by a qualified automotive electrician to ensure they are installed without affecting the vehicle’s electrical system and in the built computer system. A qualified automotive electrician is trained to ensure the installation will meet the ADR (Australian Design Rule) regulatory requirements. It is highly recommended to use a licensed auto electrician to install the lights and the accompanying wiring harness. ALWAYS take care when handling electrical wiring, placing undue force on wiring/cables can result in damage internally and cause the wiring to fail.