OVERVIEW
This post will provide all the information necessary for installing certain types of brackets to your LED Lights. If you haven't found the instructions you're looking for, feel free to email us at [email protected] and send through a request. Also covered are some quick tips whilst installing Anti-Theft Kits to the lights. If you are looking for instructions in regards to the STEDI Type-X Brackets click here.
Please note these will be updated with step-by-step instructions over time. As an early stage, we have set up brief descriptions of mounting techniques, alongside application photos to give examples of setups we have come across.
NUTS & BOLTS INSTALLATION ORDER
STEDI Light bars will come with either side brackets, sliding brackets, or both. Below is a brief run-through on both mounting styles to help you through installation. For a more in-depth run-through on brackets and fixings, visit our help center at support.stedi.com.au.
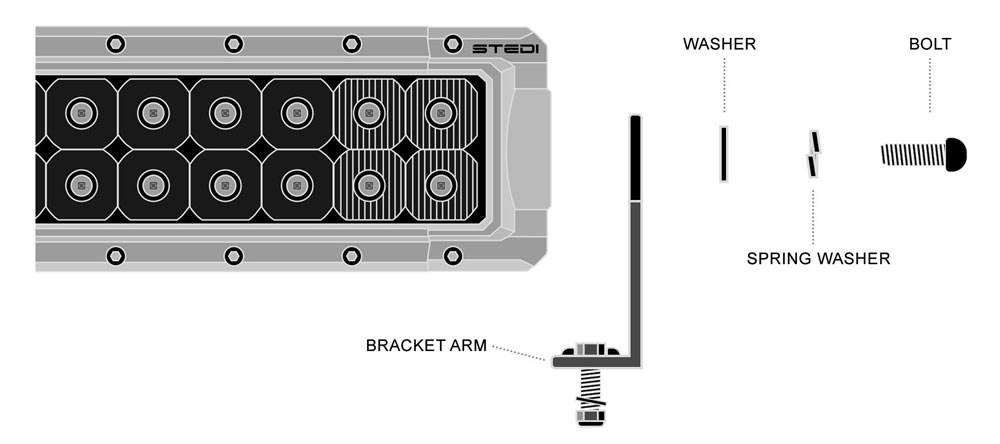
SIDE BRACKETS: Best described using the diagram below, the side brackets should be assembled in order of components: Bracket Arm > Washer > Spring Washer > Bolt.
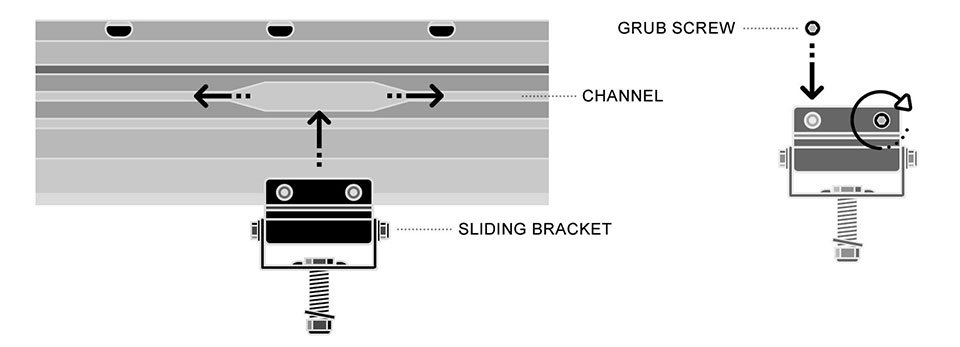
SLIDING BRACKETS: The bracket will need to be assembled prior to installation. Using the wider opening in the channel of the light bar, insert the bracket and slide to the desired position for mounting. Once the bracket is in position, tighten down the 2 grub screws to secure the position in the channel.